I am home from attending another great show, the TNNA 2014 Winter Market, this year in beautiful San Diego. Sundance Designs represents and distributes my work, and I am priviledged to be working with these great friends. We have a really fun time..always!

I discovered this ribbon last fall, which is really a lingerie elastic. I was enchanted by the gorgeous range of colors, the satin finish on one type, and absolutely bowled over by the glitter finish on the other type. After having such a wild and fun time with Sundance Sparkles, the metallic/nylon tubular material that is so versatile as a canvas embellishment, I just had to experiment with these ribbons, to see if they would also work on canvas.
Well, sure enough! Yes they do, and Yes, they are equally fun and versatile and create an impact when used on canvas. They are 'stitchy' and 'stretchy', which is actually a benefit when you use them. I Love them, and now, I'm marketing them to the needlepoint world.


Here is a little tutorial on using the ribbons on canvas. There are just a couple things you need to have and to implement when using this material.
1) Have a size 16 tapestry needle.
2) Have a bottle of Fray Check.
3) Have a nicely pointed wooden laying tool.
4) Have sharp scissors to cut the ribbon.
First, decide if you are going to use the ribbon as a surface embellishment or if you will be stitching through the canvas with it. Let's talk about surface embellishment...
This is where you apply whatever you are creating with the ribbon on top of the canvas and attach it by tacking or couching. So far, I have used matching floss...just 1 ply.
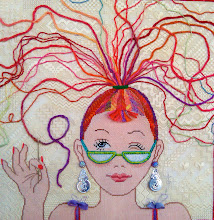
Here are examples: The yellow rose has been created by rolling the ends a little bit, attaching that to the center of the painted flower, and then, following the seam line down the center of the Stitchy Ribbon, (Satin finish, 5/8th inch wide) attach to the canvas by taking a few running stitches. This causes the ribbon to 'gather up' and fold up simultaneously, creating ruffled petals. When you make it as full as you want, tuck the end of the ribbon under and secure it to the canvas with a few stitches.
The leaves on the other hand, are made by taking one long stitch, coming up from an enlarged hole on the back, and exiting into another enlarged canvas hole on the front. Next, it has been overstitched with floss. But more about that in a minute...


Insert just the tip of the ribbon into the eye of a #16 Tapestry Needle. If you have more than that in the needle, the bulk of the ribbon is too difficult to pass through the canvas hole, enlarged or not!
Make sure to enlarge the canvas hole bigger than you normally would do...a few tries, and you will soon discover what works for you. You want the needle/ribbon to easily pass through the hole with no struggle. If that doesn't happen, either you have too much material in your needle, or your hole is not big enough. Trust me on this!


You can make leaves beautifully with the satin finish Stitchy Ribbon with one stitch, perhaps a little gather in the center for texture.

This rose was made with numerous overlapping stitches after coming up in an enlarged hole, and plunging to the back in an enlarged hole. I also folded the ribbon in half, once it was on the surface. There are many enlarged holes used to make this rose. But do you see any? No. The width of the ribbon takes up all the space of the hole. If you do see a gap, it is easy enough to take the tip of your needle and gently push the canvas threads closer together.

Another tip about the Stitchy Ribbon: With sharp scissors, cut down that center seam, seal the cut edges with Fray Check, and now you have two ribbons that are a narrower width. More Bang for your Buck!
Last...here is a little bird whose front wing is made of Glitzy Ribbon. When you come up from an enlarged canvas hole, you do not need to knot the ribbon. The width of both types of ribbon, plus the elasticity, will prevent it from pulling through. (That is, unless you give it a good tug!) I have never had to create a knot for either type of ribbon which makes my life easier, plus, it can lay flat on the back of your canvas!

In the mean time...if your LNS has not ordered the ribbon...ask for it! Your creativity needs it! I'm certain you will come up with your own methods for using both beautiful ribbons!


No comments:
Post a Comment